
By Anthony Bryant
This article was originally posted on Lost Raven Chronicles
With every other article I read mentioning something about either food costs or the impending food shortages, I felt it appropriate to do a quick article on the basic principles of canning. Today we are going to be making some strawberry jam with locally sourced, hand picked strawberries.
You’re going to need a handful of supplies for this process. Rest assured that after your initial expenses, you can save a great deal of money by jarring and canning certain things, but that’s not even what we are after today. Today we want to learn how to preserve the food we are growing in our own gardens, or even buying at local farms and super markets, so that it can be stored long term.
The United States Department of Agriculture (USDA) and the National Center for Home Food Preservation (NCHFP) both advise that home canned foods be used within the one year time span, but realistically this is more of a “Best Buy” date, because after this time period the nutritional integrity of the contents inside the jar will start breaking down. What’s important to note though is that in an emergency situation if the seal on the jar is still good then the food inside should also still be edible.
The method we are going to use for our jam today is called water bath canning. This process can be used for many different things other then jam, so I’ll try and separate the steps between the jam making and the jarring.
Here’s what you’ll need:
JARRING:
– Canning Jars and Seals: use mason-style jars that can be found at most grocery stores, the kind with the lids and the seal ring.
– Wide-Mouth Funnel: this makes filling jars with sauces or jams easier because it can be quite messy.
– Lid Magnet: for easy removal of lids and rings from boiling water, this is not a necessity but it just makes life easier.
– Ladle: for filling jars.
– Large Pot: for boiling your jars.
– Tongs or Jar Lifters: rubberized lifters make removing jars from their water bath less slippery, but a good pair of tongs can work just as well.
– Clean Cloths: used to wipe down jars, lids and rims of jars.
JAM:
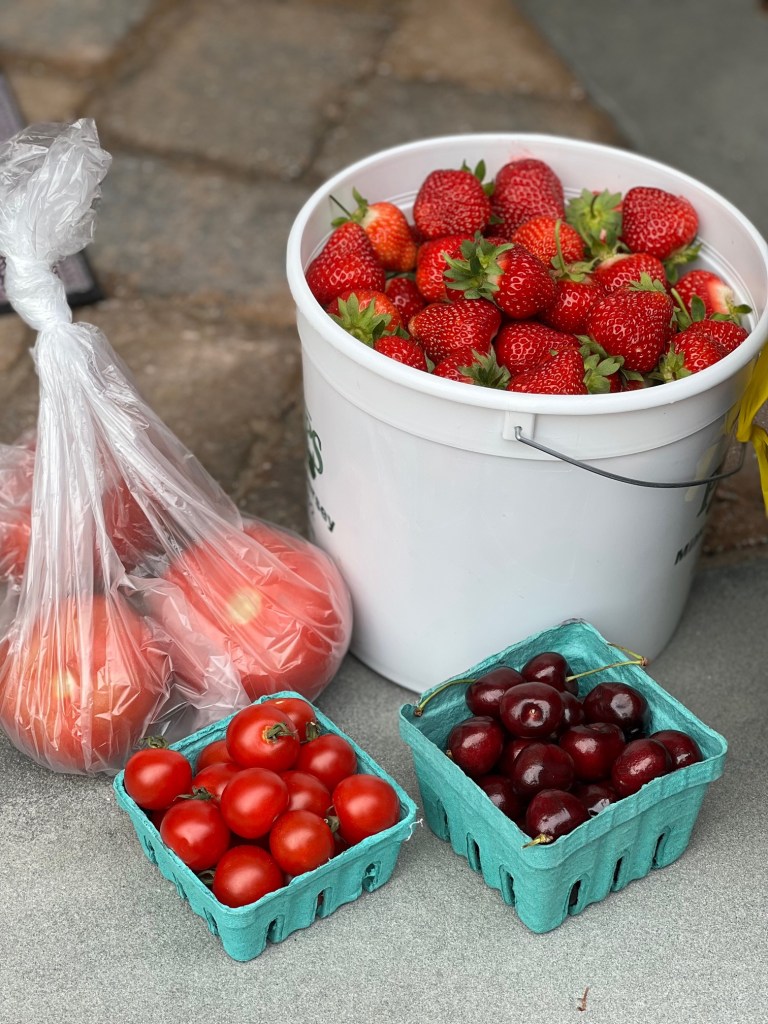
– 8 Cups Farm Fresh Strawberries
– 3 Cups Sugar
– Zest from 2 fresh lemons
– 1/4 Cup of Lemon Juice
Okay, now that you have everything, let’s get into it. One of the most important parts of this whole process is making sure that you’ve rid your jars of any bacteria.
– Step 1: Thoroughly wash and rinse all of your jars, lids and seal rings with soapy water.
– Step 2: Fill your jars with warm water and set them on some paper towels. You want the jars to be warm already when you add the hot jam to them.
– Step 3: Put your canning pot on to boil. A pot this large takes a long time to come to temperature, and believe me you won’t want to be waiting for it to boil later. Just put a lid on it and keep an eye on it till you’re ready to use it.
Okay, the next few steps are the fun part, let’s start making our jam! Don’t worry, after that we’ll get back to the canning part.

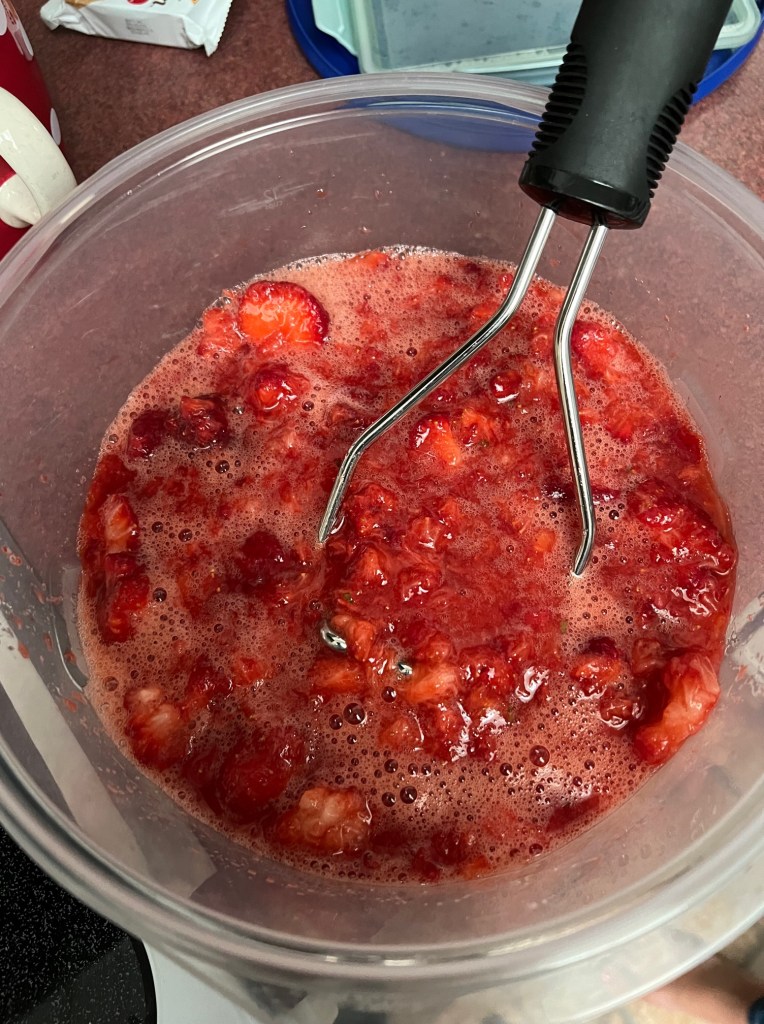
For our jam you only need three simple ingredients. Strawberries, sugar and lemons. That’s it! You will need a few tools for this part if you want to make your life a little easier. First, you’ll need either a food processor or a potato smasher, which you use really depends on what consistency you want your final product to be. You’ll also need a zester and a juicer of some sort for your lemons.
– Step 1: Clean your produce. Make sure you remove any dirt particles or chemicals from the outside of both your strawberries and your lemons.
– Step 2: Cut the caps off about 8 cups of strawberries.
– Step 3: Fully zest and juice your lemons. You’ll want the zest from two large lemons and about 1/4 a cup of the lemon juice.
– Step 4: Next you’re going to process your berries, or mash them to whatever consistency you like. Keep in mind that the smoother your jam is, the longer it will take to reach its gelling point.
– Step 5: Now you’re going to place all your ingredients into a large sauce pot. Berries, lemon zest, lemon juice and sugar all together. Stir until well blended and bring to a boil. You want this to boil for about 20 minutes, but be sure to stir frequently as to not burn your sugar.
** If you’d like to experiment with adding anything else to your recipe, now would be the time to do it. I’ve heard that adding a little vanilla or even some balsamic can really bring out some unique flavors from strawberry jam.
– Step 6: Wait for your jam to set. You’re going to leave your jam on the heat at a low simmer until it sets. What this means is you’re waiting for the jam to thicken up. This can take quite some time! You’re going to check this with what’s called the “sheeting method”, meaning you’re going to place a large metal spoon in the freezer.
After a while, take the frozen spoon out and dip it in your jam. If the jam drips off quickly in small, loose drips you’ve got a ways to go. So sit back and relax. Now, if the jam hangs on a little more and is falling off the spoon in bigger drops you’re getting there.
If the jam is falling off the spoon in bigger, longer chunks or “sheets”, or even not falling off the spoon at all then you’re right where you want to be! Time to remove from the heat!
Okay, your jam is ready to go. We’ve pulled it off the heat, but it will still stay warm. Especially in the liquid form, it will keep its temperature for more than enough time to get it into the jars!
So, let’s get back to the canning process.
– Step 4: Empty the warm water out of your jars.
– Step 5: Line your jars up on a folded towel and lay flat on your counter.
– Step 6: Fill your jars up to about 1/4 from the top of the jar. It’s important that this measurement of headspace to be pretty accurate in order to insure that the canning process happens correctly.
– Step 7: Take a damp towel and wipe down the rims of your jars. Place your lids securely on top of the jars, and put on the locking rings just hand tight.
– Step 8: Place your jars into the canning bath. You want to make sure you have a metal rack on the bottom of the pot so that the jars are not sitting directly on the heat. It’s also important that the water completely covers every jar buy at least 1-2 inches.
– Step 9: If your water is not boiling already, then wait for this process to occur. Once water is boiling you’re going to let the jars process for a full ten minutes in boiling water. This is what kills any bacteria left on the fruit or jars after washing. After these ten minutes turn off your burner and let the jars continue to soak for an additional five minutes.
– Step 10: Using your jar lifter, or a set of tongs, carefully pull each jar out of the water bath and set them on that folded towel. Allow your jars to cool overnight for at least 12 hours (at room temperature). As the jars cool you will hear them popping. This is where the vacuum process is actually happening. That’s the noise you want to hear!
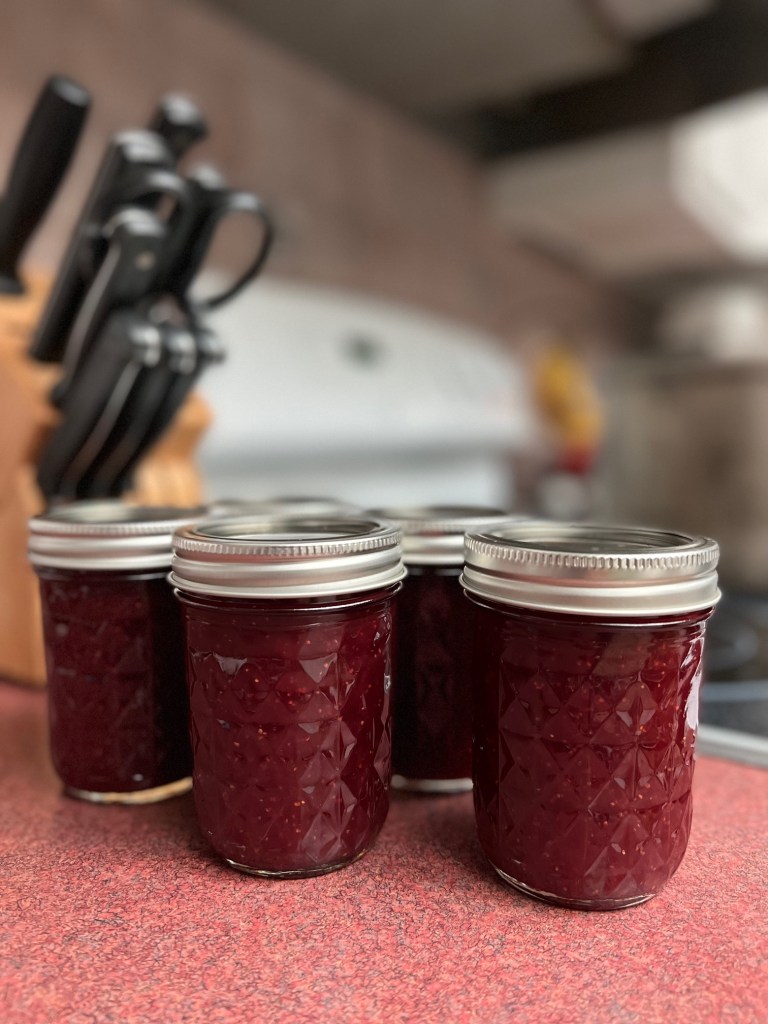
– Step 11: After fully cooling, you’re going to want to check all your seals. Make sure all of your lids are in the vacuum position (meaning they don’t pop when you push on them) and all jars are fully sealed.
Now, it’s time to enjoy! These jars are shelf stable for up to a year, so no need to refrigerate until after you’ve opened it. You can store these in the pantry with your dry goods, give them out as gifts, or (my personal favorite) dig right in! As far as the canning goes, there are a lot more options of what this process can be used for other then just jam. I’ll list some other valuable tools and notable resources below!
I’d also like to give a quick shoutout to Melissa K Norris for originally sharing this jam recipe. You can check out more from her at www.MelissaKNorris.com for some pretty great information!
Discover more from Black Flag Survival
Subscribe to get the latest posts sent to your email.
